Posts tonen met het label DIY. Alle posts tonen

dinsdag 7 april 2015

DIY no sew cardigan

On youtube you see a lot of quick sewing tutorials. I love watching and making them. I think it's because I'm often too lazy to draw a whole pattern. So here for the lazy people among us a quick tutorial on this lace cardigan. And to say it again there is no sewing involved!!!


And during the fotoshoot time for some fun pictures! Thanks Janne for the pictures!


Thanks for watching! Share this video with your friends!

XX Lydia

zondag 5 april 2015

DIY floral crown


Blue skies, chirping birds and more and more flowers. Spring is here! And with that a boost of energy to create more! This weekend I made a floral crown. You see them everywhere. A must have for every girl this spring/summer. If you're not that creative you can easily buy one. But making one yourself isn't that hard and you can chose colors that suit your skin and hair best.


You need; wire, (fake) flowers, ribbon and some decoration butterflies.


Start with measuring your head. Make your crown out of 3 layers wire for a good shaped crown.


Then start adding your flowers. Secure your flowers by binding them with your wire on your crown. Continue until you're happy with the shape of your crown.


I started with the white flowers, when I was happy with the shape I added the pink and purple flowers.


Finish with some ribbon and your decoration butterflies.


Thanks for reading! Leave a comment and share it with your friends!

XX Lydia

dinsdag 10 maart 2015

5 concrete DIY

Because I have a bizzy week I write this post at 10 PM. I selected some cool concret DIY's for you to make at home. I realy love working with concrete, it has a raw appearance and still easy to work with. It's all about the right mold and the right mixture.


How's everyone's Easter prep coming along? If you haven't had the chance to get your egg-making on, but are still hoping to squeeze in a crafting session, I've got just the project for you. Don't b...
concrete easter eggs


Fall For DIY Concrete love hearts
concrete necklace

How to make geometric concrete bookends_eHow
concrete bookends

Concrete Planters
concrete planter
DIY Cement Pencil Holders
concrete pencil holder

I hope you enjoyed this short post!

XX Lydia


vrijdag 6 maart 2015

Diy landmap

Last week I went to sostrene grene.  A lovely shop with home and DIY stuff. I came across this amazing paper, it's black and you can write on it with chalk crayons. I always wanted a map where I can mark places I've been. And that's what I made. As you can see I haven't been in many places. But in the future I hope to travel a lot. And especially out of Europe.  


I framed the paper for a more complete look. As you can see I didn't manage to draw the South-East of Europe. I find it very hard to draw all those small and large countries. So when I travel to any of those countries I have to give it another go!


Here you see a close-up of the paper. It actually is a sticker so very easy to stick on your wall too!


I hope you like it, do you have any favorite places? I definitely have, I once been to Corsica but really want to return someday.

See you soon!

maandag 2 maart 2015

DIY vintage glass box

I hope you all had a great weekend. I did definitely, when there is a lot of crafting involved :D The next couple of weeks I will show you some DIY's. Here the first one enjoy it! 


Do you know them? Those cute vintage glass boxes. They're great to display beautiful cute objects like jewellery or souvenirs. I know they are quite expensive. But I came across beautiful shaped plastic boxes. With a bit of cold paint you make in a sec your own vintage 'glass' box!

All you need is a plastic box, a brush and some gold paint. It is importent to first degrease your plastic. If you don't do that your paint won't last very long! It might be necessary to paint your box twice or even more. I had to paint tree times before I was happy with the color on the box.


I hope you like this DIY. The plastic box I got from Sostrene grene, a cute design/ everything shop in Europe. Please show me your pictures if you are getting creative with this DIY!

Love you all xx Lydia

zaterdag 14 februari 2015

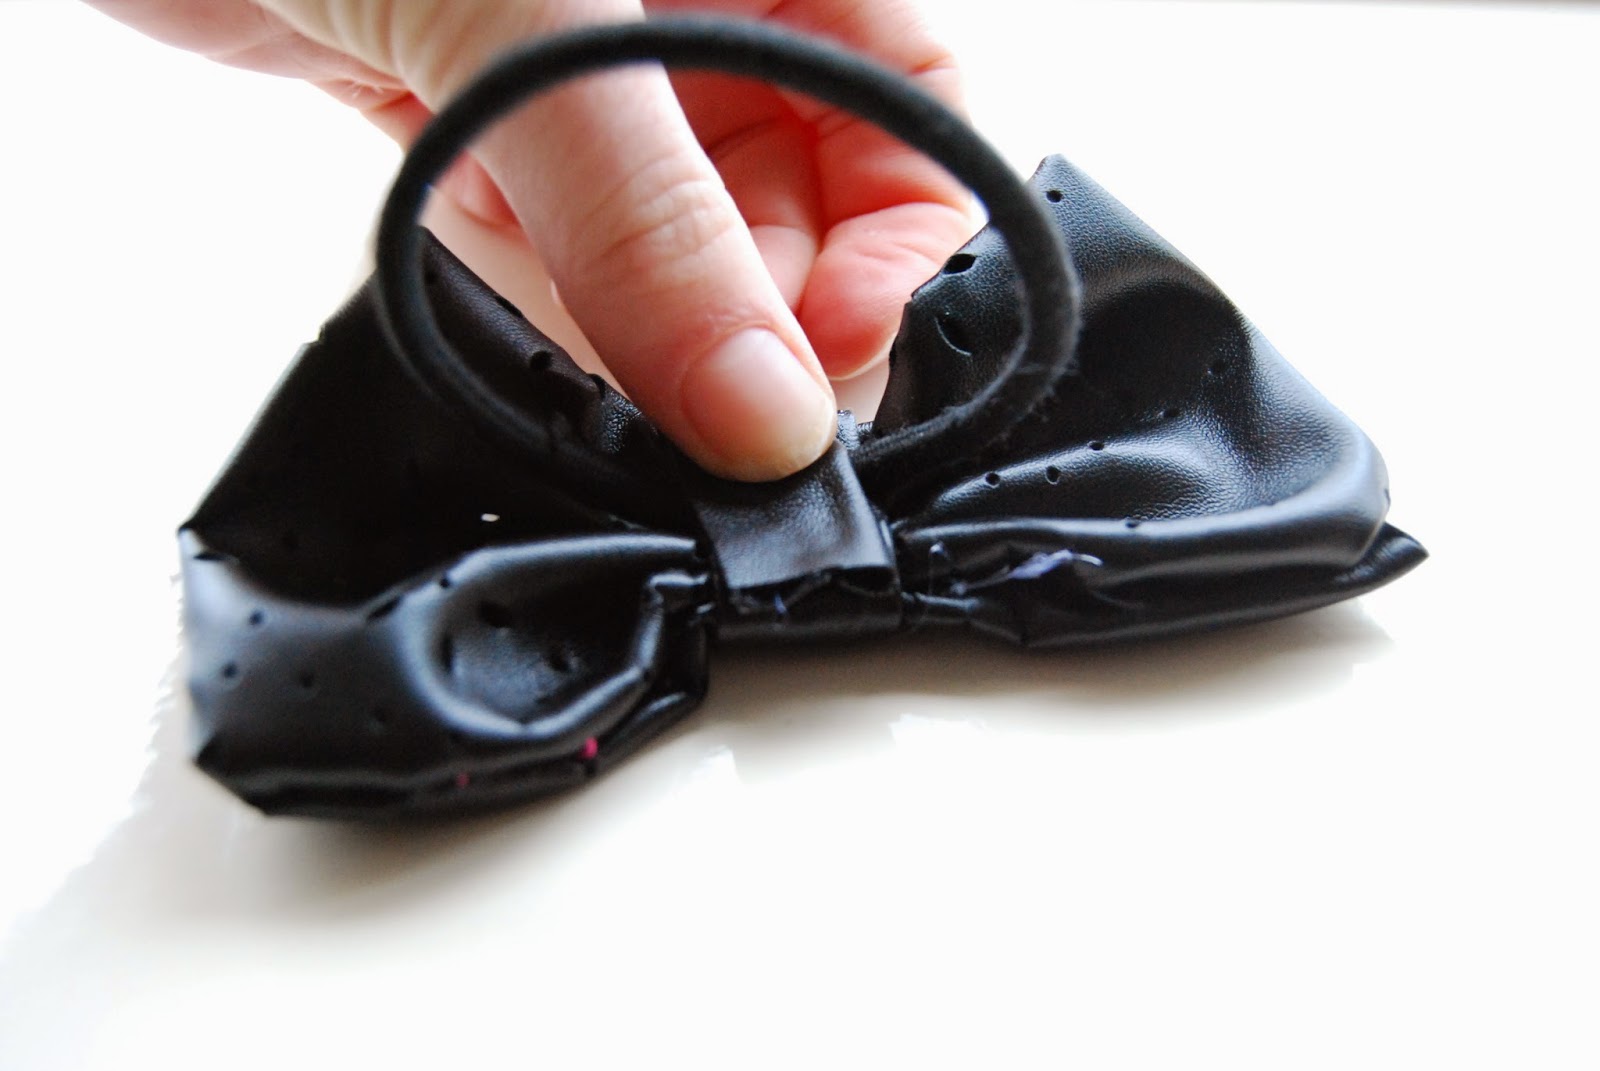
DIY Bow

You need: 
Piece of fabric 7inch x 5.5 inch or 18cm x 14 cm
And a small strip of fabric
You also need needle and tread


Fold your fabric. With the wrong sides facing you and the good side insite. 


Sew the sides and keep a hole to turn your fabric.


Turn your fabric.


Tie together with a small piece of fabric and add an elastic so you can use it as an hairband.


Finished!

zondag 1 februari 2015

A jar of happiness

It's only 2 weeks until Valentine!! Which means time to show some love to the world. I came a cross this amazing chocolate chip cookies recepie and thought I should share it with my friends. But not just as a recepie on paper but as a cute Valentine's gift. So I bought a weck jar and filled it with all the ingredients. And there you have your original Valentine's gift! For the finishing touch I made a label on canvan.com


  • 2 1/2 cups all-pourpose flower
  • 1 teaspoon baking soda
  • 1/2 teaspoon flaky sea salt
  • 15 tablespoons salted butter
  • 1 cup + 2 tablespoons dark brown sugar
  • 1/2 cup granulated sugar
  • 2 teaspoons vanilla
  • 2 cups chocolate chips
  • 2 large eggs
Mix it all in a bowl ans bake in the oven for 15 minutes. Your oven has to be 180 degrees.

I hope you understand that all the liquid ingredients are not meant to go in your jar but later in your bowl when you start baking. On the label I wrote down what you have to add later, like the eggs and the butter. I also wrote the oven temperature down on the label. I tried to layer all the ingredients so you can see the different colours.


Last week I already gave a jar of happiness to a friend of mine. She was very happy with it. And I can tell you the cookies are delicious!

Xx Lydia


zondag 25 januari 2015

DIY leather skirt


Here I'll show you how to sew a leather skirt. You can also use this tutorial for any other fabric. Because my leather fabric has little flowers in it I made an other layer under the leather one. Otherwise you could see my underwear:-s 

You will need:
  • Leather fabric 80 cm
  • Normal black fabric 80 cm
  • piece of elasitc, waist size
  • sewing machine


Tutorial

Measure your waist, and de lengthe you want your skirt to be. Then cut a square from your folded fabric. Your square has to be length of your skirt and waist/2. Now you have 2 squares with the exact same size. Did you succeed?  I hope you did, let's move on to the next step.

Sew the side seams from top to bottom (red lines in this image). And than finish this part by sewing the under seam. (green line in this image) If you did the right thing you have a black little skirt now.


Now you do the same with your leather fabric. So you get 2 seperate skirts.
this is where you'll need your elastic band.
Step 1: Cut a piece of fabric which has the lenght of your waist and the height of your elastic + 1 cm x 2.
Step 2: Fold your elastic in this fabric.
Step 3: Sew the blue line in this image.


Now sew this elastic/ fabric band unto your 2 skirts. Take a look at the foto below, as you can see now you have 1 skirt. I didn't seem the leather fabric below. Becaus it already was pretty much finished.


I find it very hard to explain how to sew a skirt or anything else. Because for me every step is easy and I know what to do without a pattern or instruction. But I hope you understand what I did in this tutorial :-)
If you have any questions left please feel free to ask them. I'm ready to help you out.

~Lydia~


woensdag 7 januari 2015

DIY magnetic board


>>English below<<

Al tijden had ik een saai magneetbord op mijn kamer staan. Ik had er wel allemaal plannen mee maar ik heb er nooit echt wat mee gedaan. Tot afgelopen maand. Ik kwam een oude lijst tegen en op eens wist ik het. Met een likje witte verf is het helemaal af. Kijk snel verder voor de beschrijving.

For ages I had a boring magnetic board in my room. Its ugly for so many reasons. I intended to do something nice with it but I never actually did it. Until last month. I found an old frame and suddenly I knew what to do with it. Only a bit of white paint and gone is my ugly magnetic board. Take a look at the pictures, I hope they will inspire you!


Met een lijm pistool plak je nu magneetjes op bijvoorbeeld een fotolijstje.
With your glue gun secure magnets on a fotoframe for a personal touch.

Comment, share, pin!!!

Xx Lydia


dinsdag 30 december 2014

DIY ombre pencil holders

>>English below<<

Deze vakantie heb ik mijn kamer een make-over gegeven. Ik heb, om mijn kamer meer mijn kamer te maken, een aantal DIY's gemaakt. Dit is er een van. De komende week zal ik er nog een paar posten. Ik hoop dat je het leuk vindt!

This holiday season I gave my room a make-over. I also did a few DIY's for a more personalized room. Here is one of them. I hope you enjoy it!!


 Bekijk het filmpje voor de beschrijving.

Watch the video for the tutorial.


Laat me weten wat jij er van vindt!

Let me know what you think of this DIY!

Xx Lydia

donderdag 18 december 2014

DIY winter pillows

This week I tried to make my room more winter ready. I added some lights and candles. But there was still too much of summer in my room. So I decided to give my pillows a quick make-over. One side of my pillow is bright (summer) and the other side is more winter like now.
And I tried something new, a tutorial on video! I have to admit, there is still a lot of practise to do. But I hope you like it!


Thanks for watching. Please share like and comment!
I love you all

~Lydia~


donderdag 30 oktober 2014

DIY candels


Het wordt al steeds eerder donker en je weet wat dat betekent... tijd voor kaarsen! Je kunt ze natuurlijk kopen maar je kunt ze ook op tal van manieren zelf maken. Vandaag laat ik er eentje zien. Ik heb nog een heleboel lont over dus misschien zit er binnenkort nog wel een DIY kaarsen maken in voor jullie. Het lijkt een beetje op koken dus ik had er veel plezier in. Je hebt nodig:


  • lont
  • kaarsvet
  • pannetje
  • potjes of mokken
  • dubbelzijdige tape
Als je dit jaar al een paar kaarsen hebt gebrand hoef je alleen nog maar lont te kopen. Want voor deze DIY heb ik oude kaarsen gebruikt en om gesmolten tot kaarsvet en zo nieuwe kaarsen gemaakt. 
Zet het pannetje met water op het gasfornuis en laat het water opwarmen. Let op het water mag niet koken!
Plak nu de lont vast op de bodem met de tape. Zo zorg je ervoor dat het in het vlammetje straks mooi in het midden brandt.

Zet het potje met restjes kaarsvet in het pannetje en wacht tot het helemaal gesmolten is. Als je wilt kun je het potje helemaal vullen door er meer kaarsvet in te gooien. Ik heb er voor gekozen om de potjes half tot driekwart te vullen. Haal het potje uit het pannetje en hang er een lont in. De lont moet boven het potje uitkomen, deze knip je later af. Laat het voorzichtig afkoelen tot dat het kaarsvet weer gestold is.
Wanneer het kaarsvet helemaal gestold is knip je de lont 1 cm boven het kaarsvet af.


Zoals je kunt zien heb ik ook een kaars in een mok gemaakt. Hier gaat wel wat meer kaarsvet in zitten maar dan heb je ook een kaars die lang mee gaat. Ik heb de potjes ook nog versiert met verf voor een extra gezellig licht.

~ Lydia~